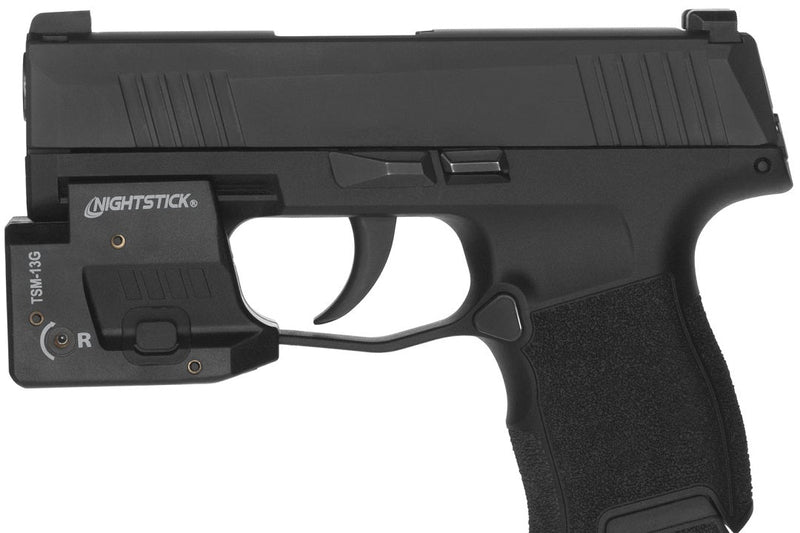


A weapon-mounted light boosts low-light PID and safety when it’s installed and maintained correctly. When fitting a tactical gun light, account for the following firearm fundamentals:
-
Clearing the firearm
-
Matching the light to your rail and mission
-
Torquing fasteners to manufacturer specs
-
Confirming alignment on the range
Regular battery checks, lens cleaning, and ongoing training keep performance reliable and legally defensible.
This guide breaks down the handgun lights selection and setup into clear steps. Nightstick and LIGHT FINDER fitment tool streamline choosing the right mounting light. You’ll learn model compatibility, installation order, torque verification, and validation drills to ensure dependable low-light performance and responsible firearm handling.
Step 1: Pre-Installation Practices
Always clear the firearm, control the muzzle, and confirm local laws before installing the best mounted light.
-
Clear and Inspect the Firearm: Remove the magazine, lock the action open, and visually confirm an empty chamber.
-
Maintain Muzzle Control: Keep the muzzle managed at every stage, even during setup and inspection.
-
Keep Your Finger Off the Trigger: Do not touch the trigger until you’re ready for intentional fire.
-
Treat Every Gun as Loaded: Assume loaded until you personally confirm otherwise.
-
Know Your Local Laws: Verify that weapon-mounted lights are permitted in your state and municipality.
-
Follow Professional Guidance: Adhere to manuals and consult certified instructors/legal counsel when needed.
Step 2: Choose the Right Tactical Gun Light
Select an LED shotgun light (or other platform light) that fits your rail, supports your mission, and activates the way you shoot for dependable low-light performance.
-
Confirm Platform Fit: Choose the correct mount interface, Picatinny or M-LOK, and match it to your firearm.
-
Match Output to Mission: Choose lumen/candela and beam pattern for distance, room clearing, or duty use.
-
Pick the Right Activation: Select momentary or constant-on, your preferred switch design, or remote switch to match your draw and retention style.
-
Check Durability Specs: Verify IP rating, shock resistance, and housing materials for daily carry.
-
Use Approved Accessories: Only use manufacturer-certified mounts, batteries, and adapters to protect reliability and warranty.
Step 3: Tools Selection
Assemble the correct tools and inspect both the light and firearm before mounting.
-
Required Tools: Torx/hex drivers and a calibrated torque driver if available.
-
Spare Power: Install OEM or manufacturer-recommended spare batteries.
-
Manuals & Specs: Follow both the light and firearm manuals; keep the brand’s spec sheets handy.
-
Rail & Clamp Check: Look for burrs, dirt, or damage; clean/repair as needed.
-
Light Inspection: Check lens, bezel, O-rings, battery contacts, and housing for wear or defects.
-
Avoid Unauthorized Modifications: Do not alter mounting hardware or adapters outside of manufacturer guidance; this can void warranty and impair function.
Step 4: Mount the Light
Once the firearm is cleared and secured, mount the tactical gun light per the manufacturer’s instructions.
-
Verify Firearm is Cleared: Reconfirm magazine removed, action locked open, and chamber empty before proceeding.
-
Seat the Clamp: Align with the rail slot and fully seat the light against the rail surface.
-
Hand-Tighten Fasteners: Finger-tighten evenly to set the clamp before applying final torque.
-
Check for Interference: Ensure the light doesn’t contact sights, slides, or controls; verify full function.
-
Keep Spare Parts & Documents: Save packaging, spare screws, adapters, and the manual for future reference and warranty.
Step 5: Security
Tighten to manufacturer specs to secure the mount without damaging threads.
-
Use a Calibrated Torque Driver: Apply the exact torque value specified by the manufacturer.
-
Avoid Over-Tightening: Excess torque can strip threads or deform the rail/clamp.
-
Threadlocker Guidance: Use threadlocker only if recommended for your model.
-
Function Cycle Check: After torquing, cycle the slide/controls to ensure there’s no binding or interference.
Step 6: Alignment & Testing
Confirm the LED shotgun light activates correctly and that the beam aligns with your natural hold in a dry check.
-
Mode: With the firearm still cleared, test momentary and constant-on to confirm reliable activation.
-
Switch Routing: If using a remote pressure switch, ensure cable management doesn’t snag or cause unintended activation. Nightstick offers several cable management accessories.
-
Hold Alignment: Present in your normal shooting stance and verify the beam centers on your sight reference.
-
Interference: Check for any mechanical interference with controls or holster geometry that could affect functionality.
Step 7: Range Verification
Validate performance under recoil to confirm mount stability and real-world alignment.
-
Live-Fire Check: Conduct a controlled session to confirm the light remains secure under recoil.
-
Watch for Movement: Look for mount creep, loosening, or beam shift; re-torque if needed.
-
Inspect Wear: If alignment changes, inspect the rail and clamp for wear or consult an armorer.
-
Range Safety: Use a certified range and follow all range and manufacturer rules.
Step 8: Holster Compatibility
Choose a holster that matches your firearm-and-light combination.
-
Choose a Purpose-Built Holster: Use a model designed for tactical gun lights or your exact combo; avoid universal holsters.
-
Dry-Draw Test: Practice draws and re-holstering to ensure no snagging or accidental activation.
-
Trigger-Coverage Check: Confirm trigger-guard coverage and retention remain correct with the light installed.
-
Resolve Activation Issues: If activation occurs during the draw, evaluate alternative switch types or holster geometry.
Step 9: Maintenance
Build a simple maintenance schedule to preserve reliability and service life.
-
Pre-Use Check: Quick function test of all modes and a visible battery check before each carry/use.
-
Monthly Testing: Verify screw torque, inspect O-rings/seals, and clean battery contacts.
-
Clean After Exposure: Wipe lens with microfiber and a suitable cleaner; check seals for damage.
-
Battery Policy: Replace batteries proactively per manufacturer guidance; avoid unknown aftermarket cells.
Step 10: Troubleshooting
Run basic diagnostics first, then escalate to the manufacturer or an armorer for unresolved issues.
-
No/Flicker Output: Reseat or replace batteries, clean contacts, and check switch wiring.
-
Mount Loosening: Re-torque to spec, inspect clamp/rail for wear, and replace parts if needed.
-
Unwanted Activation: Reassess holster fit and switch choice; consider remote pressure switch options.
-
Service Escalation: For persistent/internal faults, contact the manufacturer or an authorized service center; do not open sealed electronics.
Stay Mission-ready with Precision and Confidence
Mounting and maintaining a weapon light isn’t just about brightness; it’s about trust every time you press the trigger. Follow these installation, verification, and maintenance steps to ensure performance under pressure. Whether for duty, defense, or training. Nightstick tactical gun lights, paired with the LIGHT FINDER tool, make selection and fitment straightforward. Choose your exact fit and stay ready for every low-light scenario with proven reliability and confidence.